Plant Press - Make Your Own!
To view these resources with no ads, please Login or Subscribe to help support our content development.
School subscriptions can access more than 175 downloadable unit bundles in our store for free (a value of $1,500).
District subscriptions provide huge group discounts for their schools. Email for a quote: sheri@exploringnature.org.
Materials:
- 5 (or more) empty cereal boxes
- scissors
- glue
- paper
Procedure:
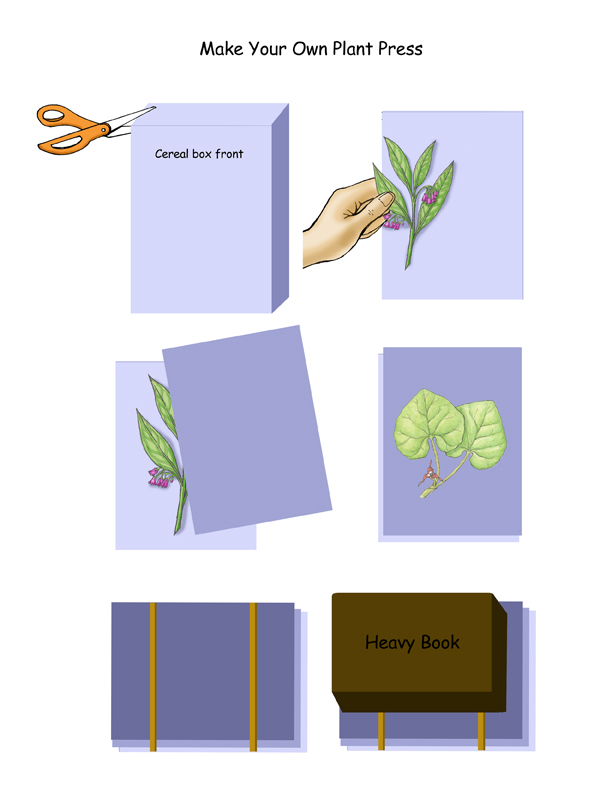
1. Cut the boxes down the sides and then trim off the sides. You now have 10 cardboard squares.
2. After you pick the plant or leaf you want to press, lay it in between two cardboard squares. You can collect up to 9 plants and lay them each flat between another layer of cardboard.
3. Lay a heavy book on top and let them sit for at least 2 weeks.
4. After two weeks glue each plant on a sheet of white paper using a bead of Elmers glue. When the glue dries it will be clear, so use enough to keep the whole pressed plant in place. A hot glue gun works great but should ONLY be used by an adult.
5. Write the name of the plant under it. These can be kept in a loose leaf notebook, pressed behind glass and framed or hung on a line with clothes pins to display.
Use Teacher Login to show answer keys or other teacher-only items.


